 Ian Dicker
1 min read
Moving Apps to Azure Part 1: Migrating an ASP.Net Application to Azure PaaS
For many businesses, the ability to run applications on Azure presents some great benefits—from lower hosting costs to better application speed,...

This blog series provides a step-by-step guide to download a simple ASP.Net application and move it to an Azure PaaS environment. This is intended to be a simple guide to setting up your first Azure PaaS application. This blog is the second installment in the series. In the first blog , I walked through downloading the source code for the application and running it in Visual Studio 2017 or 2019. Now, in the second part of this blog series, we’ll focus on step three, which is creating an Azure account and setting up the Azure resources you’ll need for the application you are moving.
To create the resources in Azure you will need an Azure account. You can create your own account at this URL: https://bit.ly/2KzQyDk.
The important thing here is that you create an account that you will have full control over. So for example, when you sign up, try to avoid using your work account if you already use Office 365 or Azure, unless you have global admin rights. If you do not have global admin rights, you may experience issues creating the resources. By creating a free account using your personal email, for example, you will be guaranteed to get the correct level of access. This will also allow you to further explore Azure for 30 days at no cost.
First, let’s cover a few basics. Everything in Azure is a Resource. Resources are contained within a Subscription. An Azure Tenant can have one or more subscriptions.
Access to resources is controlled using Roles Based Access Control (RBAC). Delving into this and other governance topics is a blog post for another day.
Resources are grouped together in Resource Groups. Think of this as a folder into which you will place things you want to store.
The first thing we need to do is log-in to the Azure portal, and then we will add some things to the favorites list to make access to them easier as we progress.
1. Open a browser window and navigate to https://portal.azure.com.
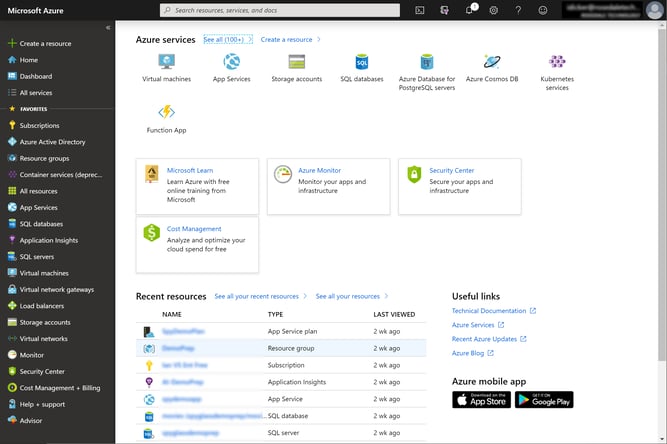
2. Enter your credentials, and you will be in the Azure portal home page, which should look something like this:
(Note that the Azure portal is constantly updating, so do not be surprised if your screen looks slightly different.)
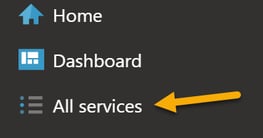
3. You will notice that under favorites I have a number of options, likely more than your new account will have. We should add the ones we will need for this blog post to make it quicker and easier for you to navigate the UI. From the Left Navigation select All Services:
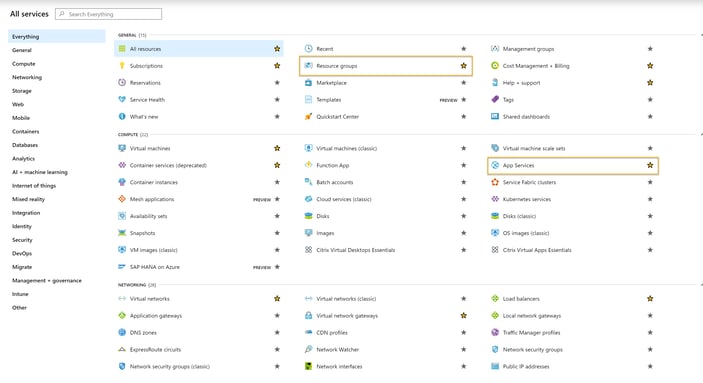
4. On the list of All Services, click the star next to the following items:
Use the Search Everything box at the top to help find the items. For example:
We can now create the Resource Group, which will be used to hold all the resources we need. During the creation of many resources, you will have the ability to create Tags. Tags are used to help manage resources at scale and are out of scope for this blog.
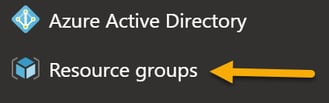
1. Click on the Resource Group link in the Left Navigation that you added earlier.
2. The list of Resource Groups will be displayed.
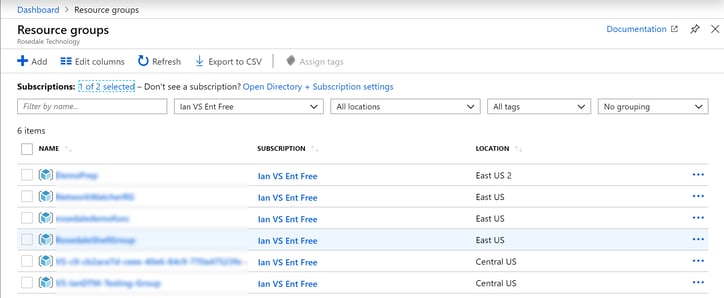
3. Click the Add button at the top.
4. Ensure the correct subscription is selected if there are multiple subscriptions available. Enter a name for the resource group. Select the Region the resources are to be created in. Select Review and Create and complete the wizard to create the resource group.
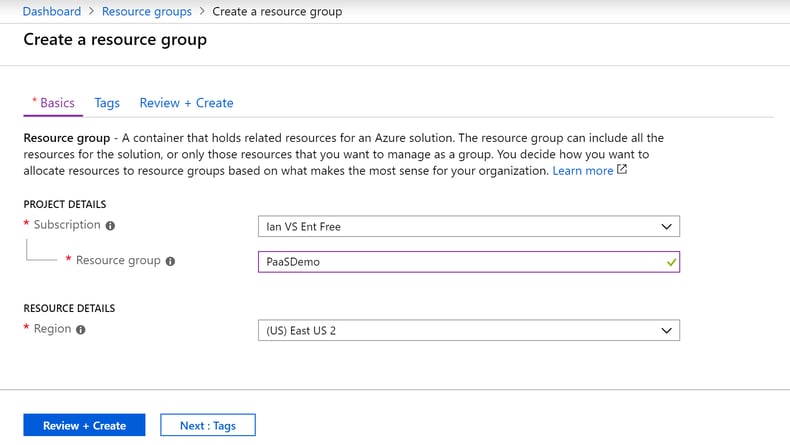
Note that depending on the region you select, charges and features may differ.
Next, we need to create the “virtual web server” and “web application” that the ASP.Net application will run on. We need to define the “virtual hardware” that the server will run on.
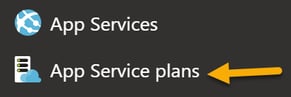
1. Click on App Service Plans.
2. From the list of App Service Plans, click Add.
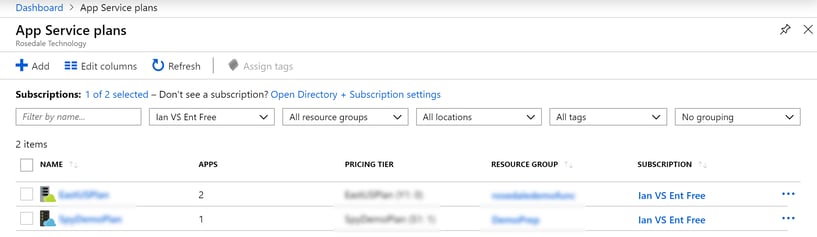
3. On the Add App Service Plan dialog, ensure the subscription is correct. Select the Resource Group you created earlier.
Define a name for the Service Plan.
Select the Windows operating system.
Ensure that the Region is the same as the one used for the Resource Group. Azure tends to default to certain regions, and it does not always make sense. Pay close attention to the region that the resource is created in. It is possible for the different pieces of the infrastructure to be in different regions.
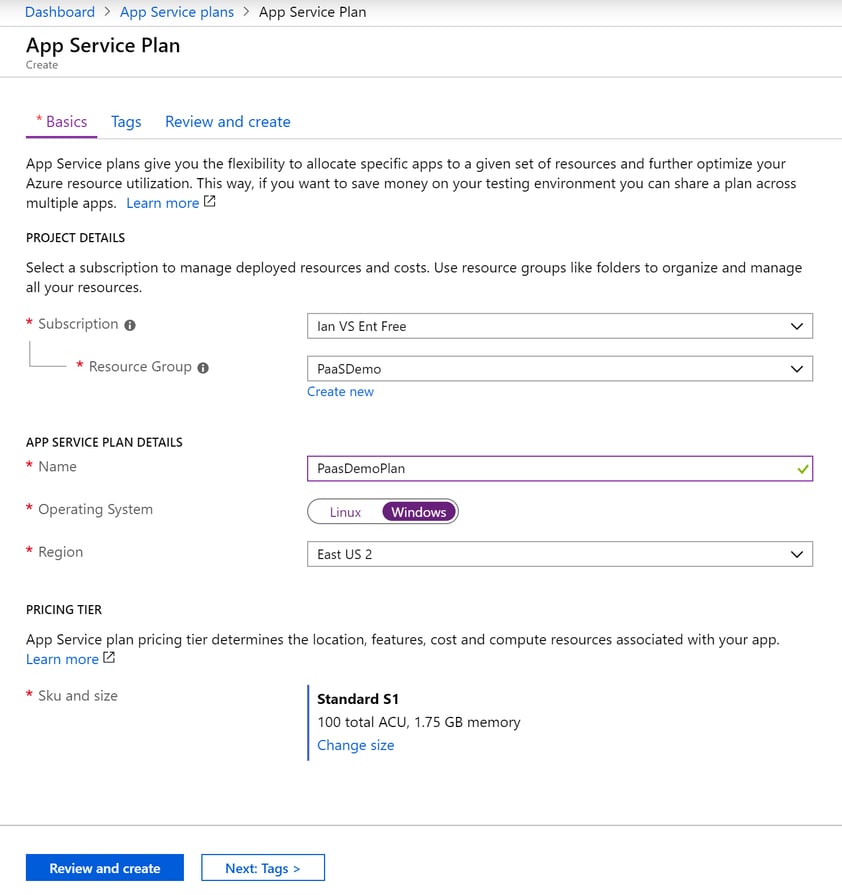
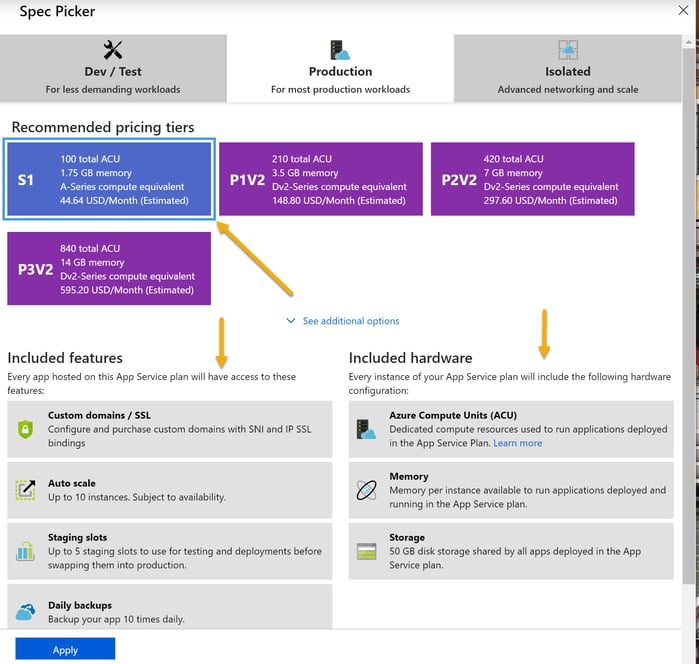
4. If you select the SKU size link, you can change between Dev/Test or Production Level Service Plans. Select the SKU Size (for the purposes of this demo, you can use the Standard S1). The SKU size determines the amount of resources assigned to the Service Plan; note that as you select different options the list of included features and hardware changes, as does the cost. The cost for the service plan is paid while it exists—unlike some resources which are consumption based—the App Service plan is paid for even if your web application is not being used. For more information, see: https://azure.microsoft.com/en-us/pricing/details/app-service/plans/.
Click Apply.
Click Review and Create, and then complete the wizard.
5. Now that we have created the App Service plan, we can create the web application. Note that Microsoft documentation is in the progress of changing from Web Apps to App Services—see: https://azure.microsoft.com/en-us/services/app-service/web/.
Click on the App Services link in the Navigation.

6. Click on Add.
7. Select the correct Subscription and resource group.
Specify the name of the application—this needs to be unique and is the default web endpoint for the application. Custom DNS can be specified—but for the purposes of the demo we will use this default. For example: https://spyglasspaasdemo.azurewebsites.net/.
For this demo, we are using code (not a Docker image).
Set the runtime to be .Net 4.7 (note the huge selection of runtimes).
Select the Windows operating system.
Set the Region to the same region used for the Resource Group, and App Service plan.
Finally, select the App Service plan you just created.
Click Next.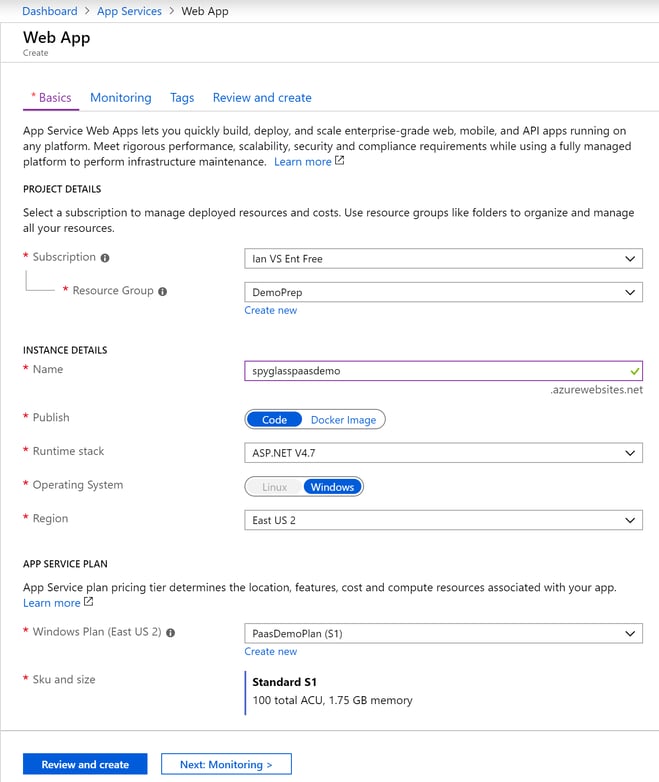
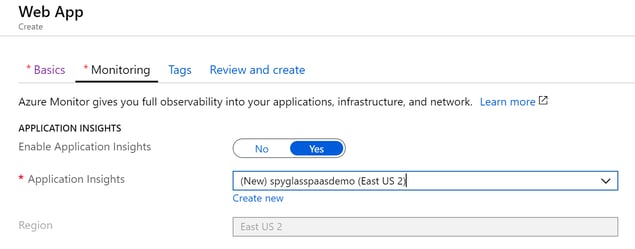
8. The monitoring tab allows you to create a new or bind the application to an existing Application Insights instance. Application Insights provides a cloud-based Application Performance Monitoring tool. It allows you to monitor the application performance for things such as requests per second, average response time and exceptions, along with much more. It is a part of the Azure Monitor Product (See: https://azure.microsoft.com/en-us/services/monitor).
On the Monitoring tab, create a new Application Insights.
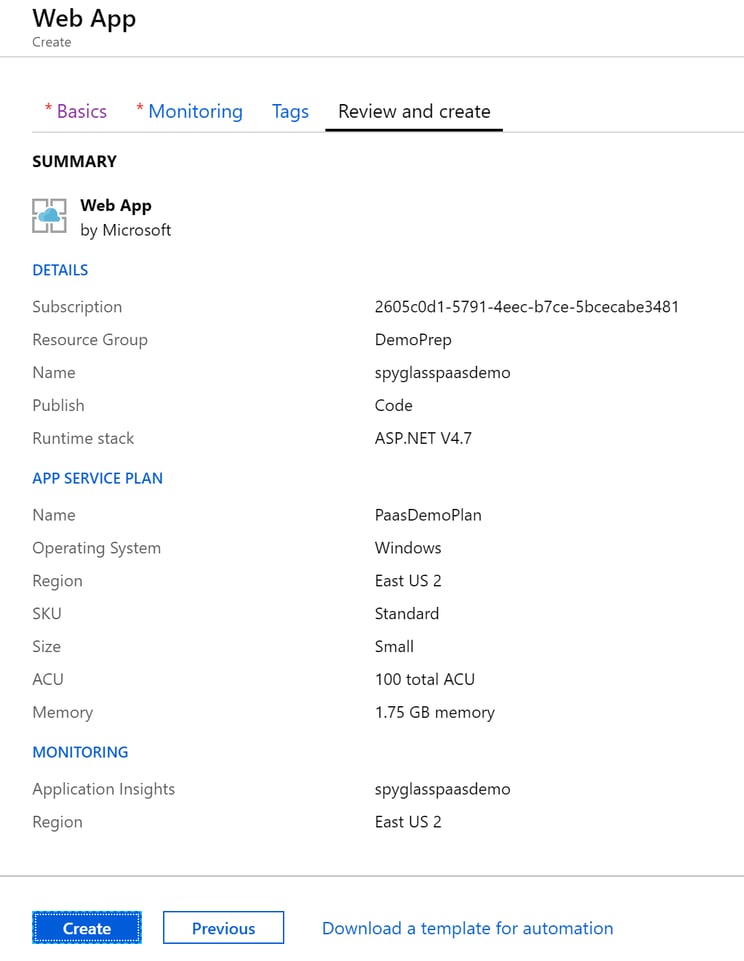
9. Review and Create.
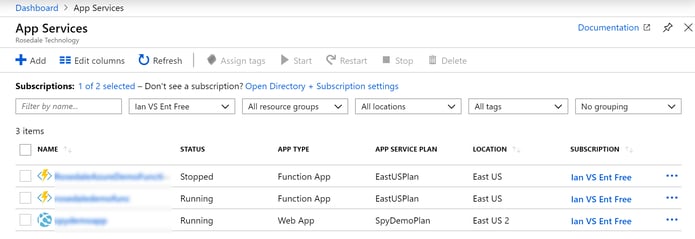
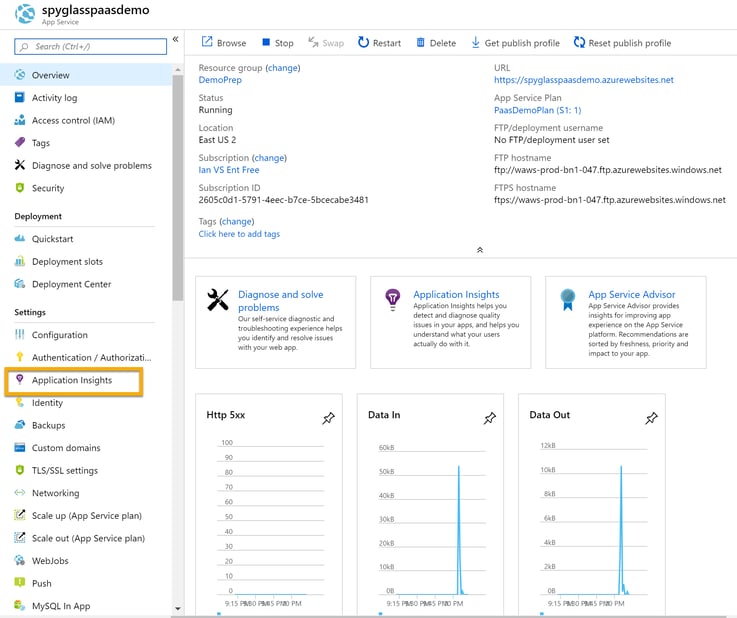
10. Once the App Service has been provisioned, click on App Services.

Once the list of App Services is displayed, click the link for your App Service created earlier.
This will display the App Service Overview page. From this page in the Left Navigation, click Application Insights.
11. Set the options for Application Insights gathering.
Ensure it is enabled.
Set the level to Recommended.
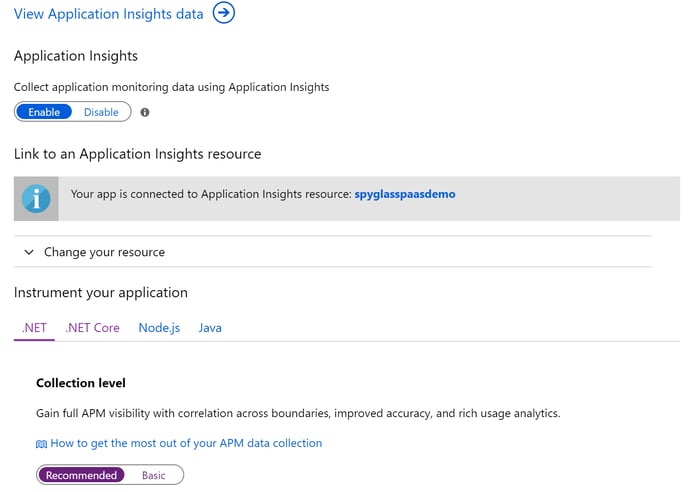
Enable the Profiler.
Enable the Snapshot Debugger.
Show local variables.
Enable SQL Commands.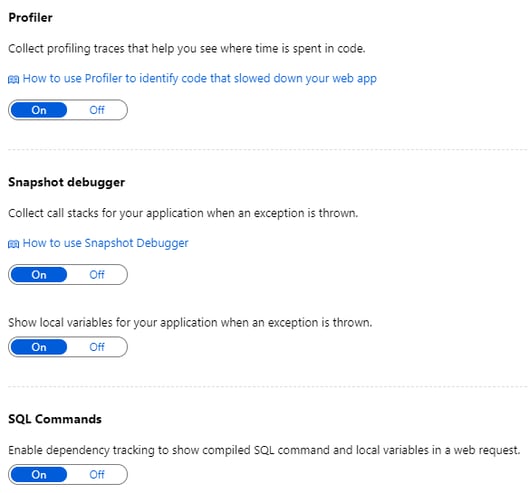
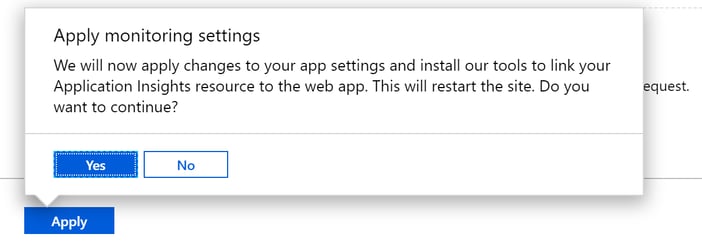
12. Click apply and confirm restart.
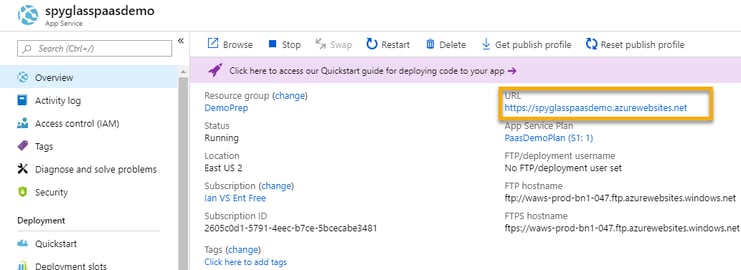
13. Navigate back to the Overview page for your App Service, and click the link to test that the endpoint is functioning:
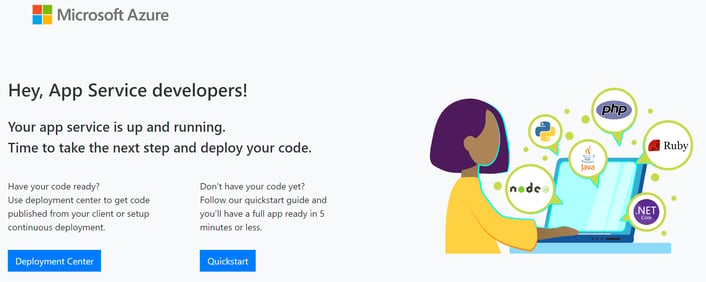
14. The Web Application is operational!
After following these instructions, you should be up and running with Azure App Service. In the next installment (part three) of this blog series, we’ll go through deploying the application on Azure. Let us know if you need any assistance or would like to talk to an expert partner about what Azure can do for your business. We’re eager to help.
Read the next blog of the series: Moving Apps to Azure Part 3: Deploying an ASP.Net Application on Azure PaaS.

1 min read
For many businesses, the ability to run applications on Azure presents some great benefits—from lower hosting costs to better application speed,...

1 min read
This blog series includes a simple, step-by-step guide on how to move an ASP.Net Application to an Azure PaaS environment. This is the fifth...

1 min read
In this blog series, I’m walking through a step-by-step guide that will show you how to move your first ASP.Net application to Azure Platform as a...