 Salman Mahmood
1 min read
Power Apps Portals: How to Build External Low-Code Websites
On October 27th, our Senior Solutions Architect, Mary Harvey, led guests on a live webinar through an in-depth introduction to Power Apps Portals....

One of the very common requirements for a Power Apps Portal is to build a form that allows a user to create \ edit records in the Dataverse tables. There are two ways to do that. One is to use Basic Forms (Entity Forms) and the second is to use Advanced Forms (Web Forms). Microsoft recently made some terminology changes for Power Apps Portal, and as a result, Web Forms under the Portal Management App will now be called Advanced Forms.
If you have been working with Power Apps portal for a while, you probably know the difference between Basic Forms (Entity Forms) and Advanced Forms (Web Forms), but if you just started learning Power Apps Portals, this is one of the concepts that people can find difficult to wrap their heads around. With these new naming conventions, I think it is really going to help clarify everything for users.
For the Advanced Forms, it is a best practice to plan out your steps. This is because an Advanced Form will allow you to go through a series of steps, including conditional statements, but you really want to plan ahead since there’s a lot of work that you need to do to make sure that its connected correctly.
Please note that we will not be covering conditional statements and tabs forms in this blog as the focus of this blog is to quickly create an Advanced Form with just a couple of steps to collect information and show you how to integrate custom JavaScript.
In this blog we will cover-
You’ll need to have a few things to get going:
* Please note for this exercise we will be creating a two-step Advanced Form (Web Form) that will have multiple tables in the Dataverse. In addition to that, we will be using one main table for the choice fields that will allow us to manage all the choices for the choice type fields in one central location for our form.
To create an Advanced Form in the Power Apps Portal, the first step is to create Dataverse Tables with the custom fields you want to display in the form. We can create one Table with all the steps an Advanced Form has, but here we want to keep the employee information separate than the vaccine record information, so we will be creating a couple of tables. You can later link them together with the record id.
Set up Dataverse Tables
Tables in the Dataverse that we will be creating-
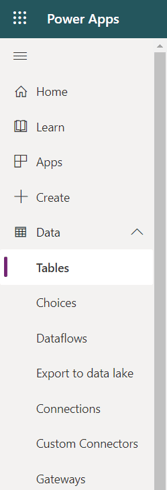
Sign in to PowerApps
Under Data select Tables and add New Table

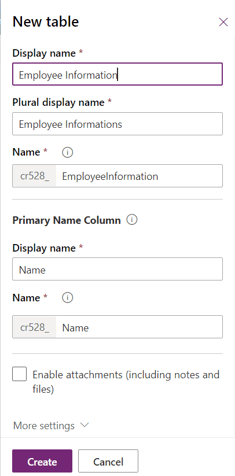
Add Display Name “Employee Information” and hit Create.
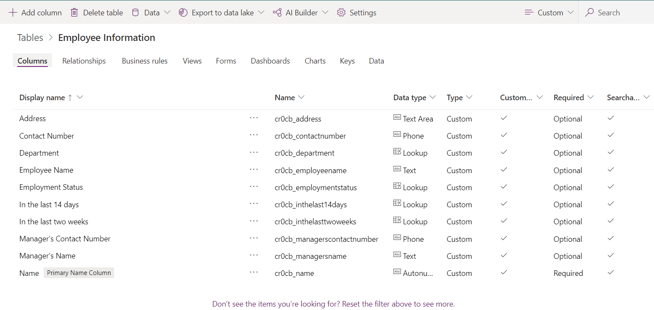
Do the same for the Vaccine Received Information and Dropdown Choices Tables. Once you are done, go back to the Employee Information Table and add Custom fields as defined below in the screenshot.
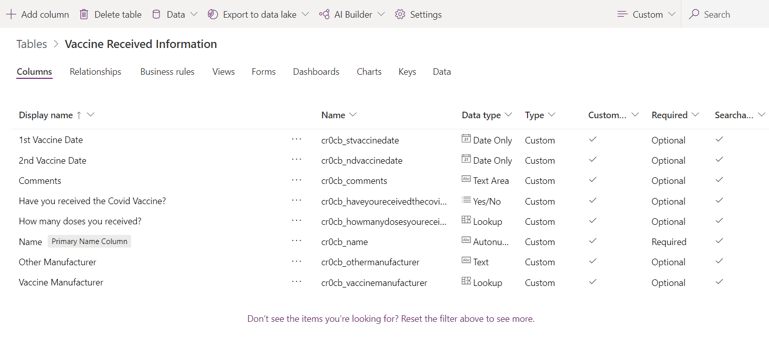
Repeat the same steps for the Vaccine Received Information and Dropdown Choices Tables.
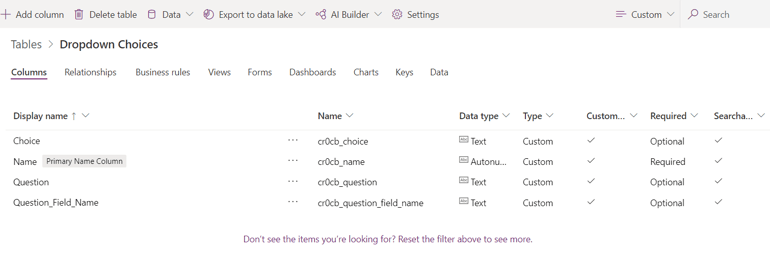
Once all tables are created, go to Forms under each table and update its Main Information Form with the custom fields you want to display in the form.
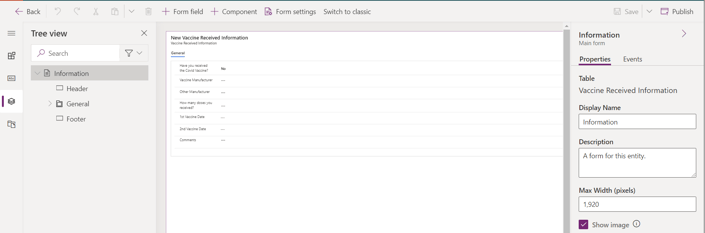
Employee Information Form

Vaccine Received Information
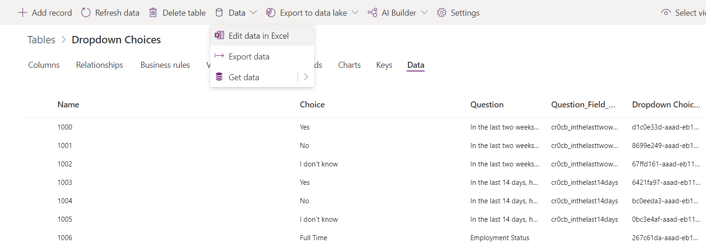
Once you have updated the Main Information Form, you can add some sample data in the Dropdown Choices table for each dropdown in your form steps. You also have an option to Edit Data directly from an Excel desktop app, which is very useful if you have tons of values to create.
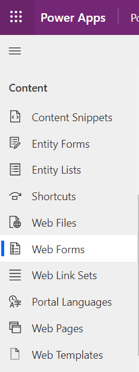
Create an Advanced Forms (Web Forms)
Navigate back to Home in the make.powerapps.com link and click on Apps
Under Apps Click to open Portal Management App
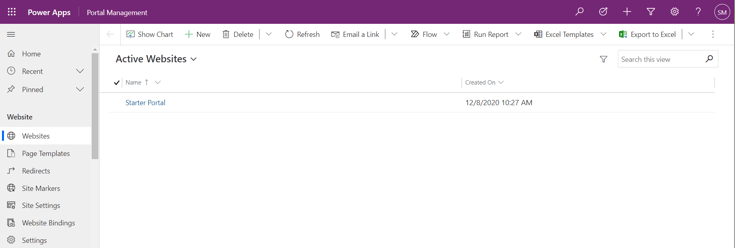
In the Portal Management App Click on Advanced Forms (Web Forms)
Select New Web Form to create new Advanced Form (Web Form) record
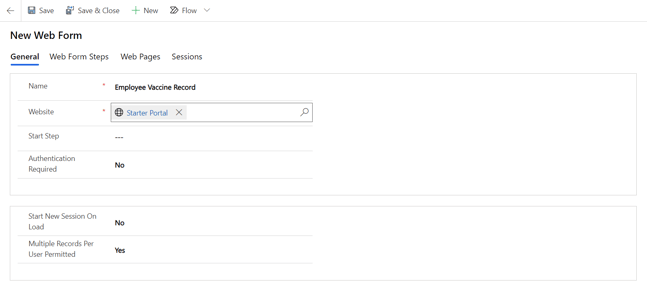
Give the name Employee Vaccine Record and hit save. Once the Form record is created you can add Start Step
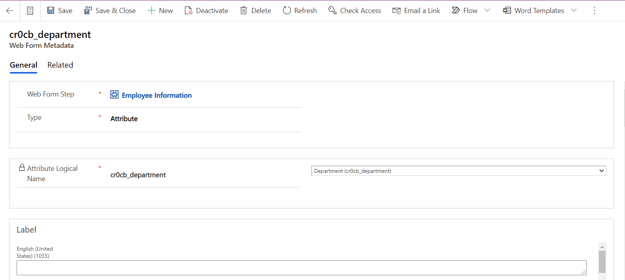
Now add our first step that is Employee Information Step and set the information form as below
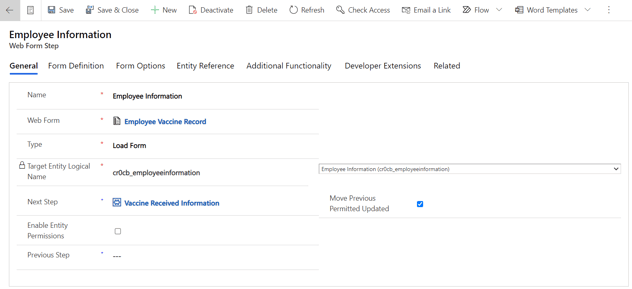
Create Metadata type attribute for each choice field and render that as a dropdown field to display in our form
Here is a list of dropdown fields we have in the form-
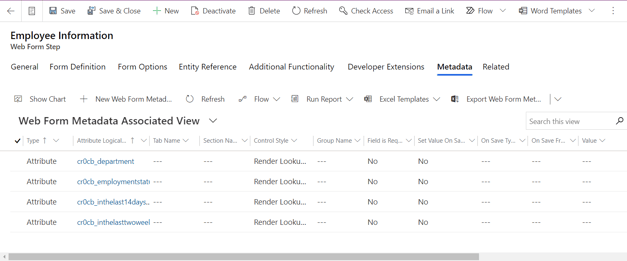
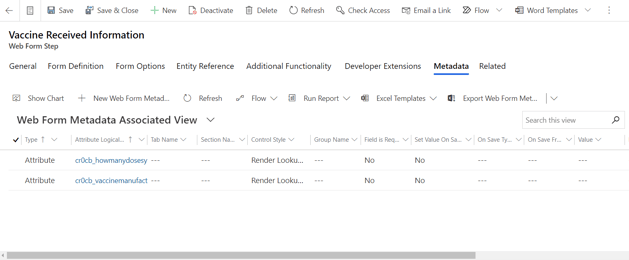
Repeat the same steps for the Vaccine Received Information step
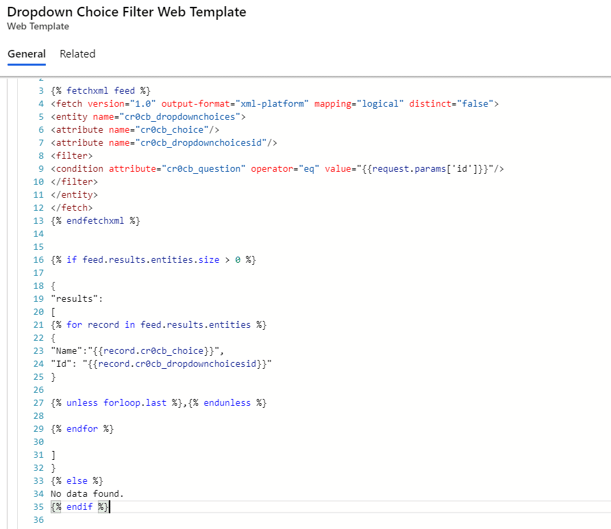
Now, click on the Web Template in the Portal Management App and create new Web Template
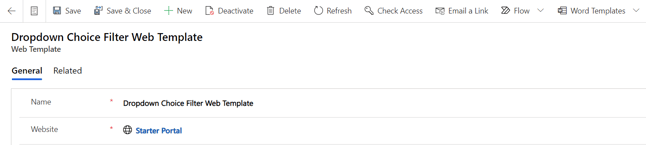
Give the name “Dropdown Choice Filter Web Template”
Add a FetchXML to get the Choices from the Dropdown Choices Table and query based on the Question label in the Form
The sample code is as shown below-
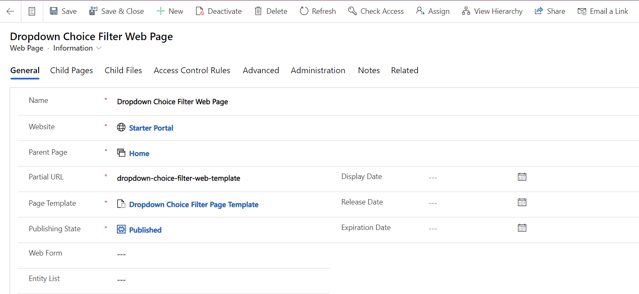
Now, first create the Page Template “Dropdown Choice Filter Page Template” and then create Web Pages “Dropdown Choice Filter Web Page”
Once we have all the above set up, we will update the code in the Employee Information step
Navigate to Advanced Forms (Web Forms) in the Portal Management App, and open Employee Vaccine Record
Click on Web Forms Steps, open Employee Information Step and navigate to Forms Options
Update the code as below-
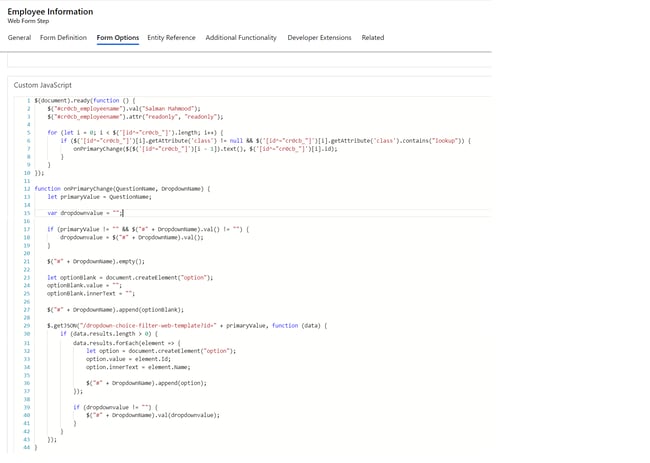
We will call our template and load the data in the dropdown fields on the form
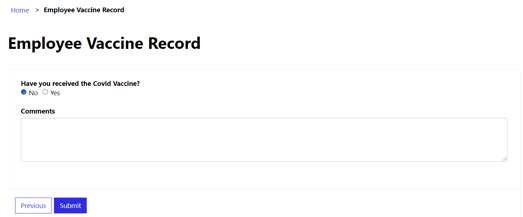
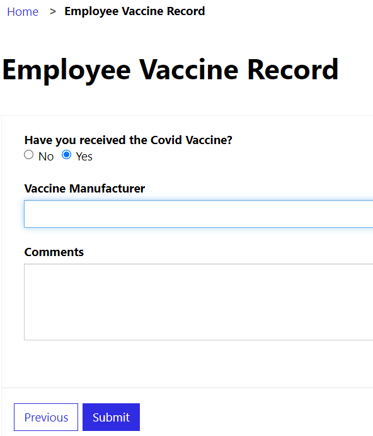
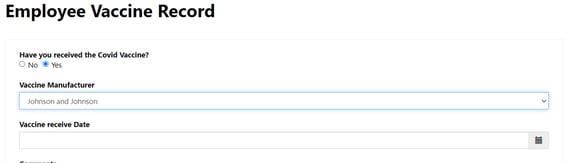
In the Vaccine Received Information Step we have multiple requirements for conditional hide\show the fields based on the user selection. The first hide\show we can trigger on is "Have you received the COVID vaccine?" question. When the user select Yes, we can display the Vaccine Manufacturer question.
Now click to open the Vaccine Received Information Step, and update the code as below in the Form Options section-
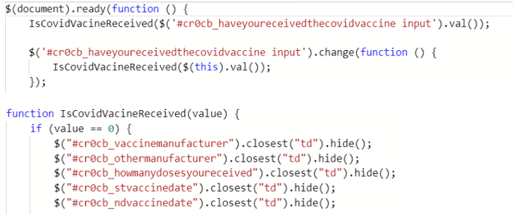
We can also reset the values in the fields when the user switch back from Yes to No.

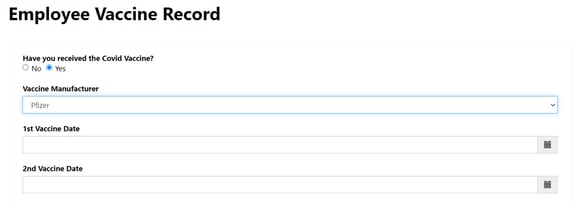
Based on the type of Vaccine the user selects, we can also display number of doses user received, if user select Pfizer, it will display 1st Vaccine Date and 2nd Vaccine Date. If the user selects Johnson & Johnson, it will display only one Vaccine received Date.
You can open the Form Options section under Vaccine Received Information Step and update the code as below-

Web Forms steps have some out of the box options available for Form fields validations, that you can add by creating a Metadata attribute type tag but if you have conditional validation required that trigger on based on other fields in the form, then you can use custom code.
As you can see, we can easily write a JavaScript to hide\show the forms fields. We can also use the custom code for form fields validations.
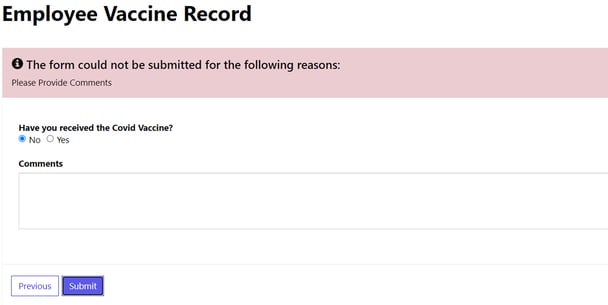
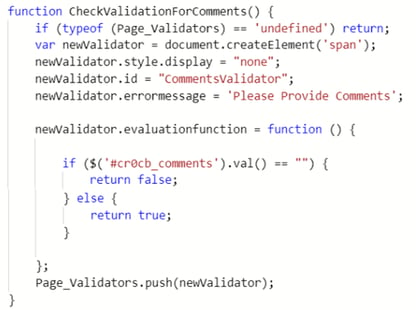
For example, if we want to add a validation on the Comments field, we can update the code as below-

When the user tries to leave the Comments field blank on the question of "Have you received the Covid Vaccine?" our code will check that and force the user to provide the comments before being able to submit the form.
Sample code for that is as below-
Power Apps Portal has become immensely popular in last couple of years, and more than 86% of Fortune 500 companies are using the portal to build applications that they can now share with external users. While Power Apps Portal is easy to use by design, there is a lot involved when it comes to making it work best for your enterprise needs. If you have any questions on this or want to work with our Power Platform experts, please reach out to Spyglass. We’re here to help you make the most of your Microsoft environments. Let’s talk.

1 min read
On October 27th, our Senior Solutions Architect, Mary Harvey, led guests on a live webinar through an in-depth introduction to Power Apps Portals....

1 min read
This blog is a follow-up to part one of this series, where we are providing a how-to guide to create a PowerApp that extends the functionality of...
.png)
1 min read
In the era of big data, businesses rely heavily on data analytics tools like Power BI to draw insights and make informed decisions. A crucial...